Timeless Apple Delight: A Recipe for Comfort and Nostalgia
There’s something undeniably enchanting about a homemade apple pie. The mere thought of it conjures images of warm kitchens filled with the aroma of sweet, spiced apples, flaky crusts, and the comforting presence of family gathered around the table. For many, baking apple pie is more than just preparing a dessert; it’s a cherished tradition that carries with it a deep sense of nostalgia, evoking memories of childhood, family gatherings, and the changing seasons. This classic recipe, often passed down through generations, has the power to transport us back in time, reminding us of simpler days where the warmth of home and the joy of sharing good food brought us together.
The sensory experience that accompanies the making of an apple pie is a symphony of flavors and aromas. As the apples caramelize and the spices mingle, the kitchen transforms into a haven of comfort. The golden crust, with its rich buttery aroma, beckons to be sliced, revealing the jewel-toned filling that glistens with sweetness and spice. Every bite is a celebration of autumn, capturing the essence of the season in a warm, inviting dessert. In the following sections, we will explore the intricate details that make up the recipe for Timeless Apple Delight, guiding you through each step to ensure that your pie is not only delicious but also infused with the love and care that comes from homemade cooking.
The Essence of Timeless Apple Delight
Apple pie holds a special place in the hearts of many cultures around the world. From the classic American version celebrated during Thanksgiving to variations found in French and Dutch cuisines, the pie symbolizes warmth, comfort, and home. Each culture adds its unique twist, but the core idea remains the same: a harmonious blend of sweet and tart apples encased in a flaky crust, often enjoyed with a scoop of vanilla ice cream or a dollop of whipped cream.
Seasonally, apple pie is particularly relevant in the autumn months when apples are harvested and the air turns crisp. This is when the flavors of cinnamon, nutmeg, and caramelized apples feel most at home, making it the perfect time to bake. The arrival of fall not only signals the beginning of cozy evenings but also invites the opportunity to gather with loved ones, sharing hearty meals and heartwarming desserts like apple pie.
As we delve into the recipe for Timeless Apple Delight, you’ll find that each ingredient plays a significant role in crafting the perfect pie. The foundation begins with the crust, a delicate balance of flour, butter, sugar, salt, and ice water, which sets the stage for the filling. The filling itself is where the magic happens, combining apples with spices and a touch of lemon juice to create a symphony of flavors that dance on the palate.
Understanding the Ingredients
Before we dive into the steps of crafting this delightful pie, it’s essential to understand the ingredients that will come together to create the perfect Timeless Apple Delight.
The Crust Ingredients
The crust is arguably one of the most critical components of any pie, and for our Timeless Apple Delight, we will need:
– All-Purpose Flour: The backbone of the crust, providing structure. The right flour ensures a tender yet sturdy base that can hold up to the juicy filling.
– Unsalted Butter: This ingredient lends richness and flavor. Using cold butter is key, as it creates a flaky texture when combined with the flour. The butter’s fat content is critical in achieving that melt-in-your-mouth quality.
– Granulated Sugar: While it serves to sweeten the crust slightly, sugar also aids in browning, giving the crust a beautiful golden hue when baked.
– Salt: A pinch of salt is crucial; it enhances the flavors of the crust and balances the sweetness from both the sugar and the filling.
– Ice Water: The final touch, ice water helps to bring the dough together without melting the butter, maintaining the cold temperature necessary for flakiness.
Each of these ingredients works together, contributing to the crust’s texture and flavor. The secret to a perfect pie crust lies in the technique of mixing the ingredients just enough to create a cohesive dough without overworking it, which can lead to a tough texture.
The Apple Filling
Next, we turn our attention to the filling, where the real star of the show resides: the apples. For an ideal apple pie, the choice of apples is crucial. We recommend using a combination of:
– Granny Smith Apples: Known for their tartness, these apples provide a refreshing contrast to the sweetness of the sugars in the pie. Their firm texture holds up well during baking.
– Honeycrisp Apples: Renowned for their sweetness and crispness, Honeycrisp apples add a delightful flavor that balances perfectly with the tartness of Granny Smith apples.
In addition to the apples, the filling requires a few key spices:
– Cinnamon: This warm spice is essential, bringing depth and a comforting aroma that pairs beautifully with apples.
– Nutmeg: With its slightly sweet and nutty flavor, nutmeg adds a layer of complexity to the filling, elevating it beyond the ordinary.
– Lemon Juice: A splash of lemon juice brightens the filling, balancing the sweetness and enhancing the overall flavor profile. It also helps to prevent the apples from browning too quickly.
These ingredients come together to form a luscious filling that captures the essence of autumn in every bite.
Step-by-Step Guide to Crafting the Perfect Apple Pie
Now that we have a solid understanding of our ingredients, let’s dive into the process of crafting the Timeless Apple Delight. We will begin with the preparation of the pie crust, followed by the creation of the apple filling.
Preparing the Pie Crust
1. Mix the Dry Ingredients: In a large mixing bowl, combine the all-purpose flour, granulated sugar, and salt. Whisk the dry ingredients together to ensure they are evenly distributed.
2. Incorporate the Butter: Cut the cold unsalted butter into small cubes and add it to the flour mixture. Using a pastry cutter or your fingertips, work the butter into the flour until the mixture resembles coarse crumbs. Be careful not to overwork the dough; you want to see small pieces of butter throughout for that flaky texture.
3. Add Ice Water: Gradually add ice water, one tablespoon at a time, mixing gently with a fork until the dough starts to come together. You may need 4 to 6 tablespoons, but add just enough until the dough holds together when pressed.
4. Chill the Dough: Once combined, divide the dough into two equal halves, shape each into a disc, wrap in plastic wrap, and refrigerate for at least one hour. Chilling the dough is crucial, as it allows the gluten to relax and ensures a tender crust.
Creating the Apple Filling
1. Prepare the Apples: While the dough chills, peel, core, and slice your chosen apples. Aim for uniform slices to ensure even cooking.
2. Combine Ingredients: In a large bowl, toss the sliced apples with granulated sugar, cinnamon, nutmeg, and lemon juice. Ensure the apples are well-coated with the mixture.
3. Let it Rest: Allow the filling to sit for about 15 minutes. This resting period is essential, as it lets the flavors meld together and allows the apples to release some of their juices.
Rolling Out the Dough
1. Roll the Dough: Once chilled, remove one disc of dough from the refrigerator. On a lightly floured surface, roll it out into a circle about 12 inches in diameter, ensuring an even thickness.
2. Transfer to Pie Dish: Carefully transfer the rolled-out dough to a 9-inch pie dish. Gently press it into the dish, making sure there are no air pockets. Trim any excess dough hanging over the edges.
The preparation of your pie crust and filling sets the foundation for the Timeless Apple Delight. In the next part of our journey, we’ll explore how to assemble the pie, bake it to perfection, and serve this classic dessert to your family and friends.
Techniques for Rolling Out Dough Effectively
Rolling out pie dough can be daunting, but with the right techniques, it becomes an enjoyable part of the baking process. Start by ensuring your dough is chilled before rolling. Cold dough is less sticky and easier to handle. Dust your work surface and rolling pin with flour to prevent sticking.
When rolling out the dough, begin from the center and work your way outward, applying even pressure. Rotate the dough a quarter turn every few rolls to maintain a circular shape. Aim for a thickness of about 1/8 inch, which provides a sturdy base for your pie without being too thick. If the dough cracks at the edges, simply pinch it back together.
Tips for Transferring the Dough to the Pie Pan Without Tearing
Transferring the rolled-out dough to your pie pan can be tricky, but a few simple techniques can help. One effective method is to use the rolling pin as a lifting tool. Gently fold the dough over the rolling pin, making sure it doesn’t stretch too much. Carefully unroll it over the pie pan, allowing the dough to settle into the pan without stretching.
Alternatively, you can cut the dough into quarters and transfer it piece by piece, pressing each piece into the pan. If you notice any tears, simply patch them with excess dough. Remember, some imperfections are part of the charm of homemade pies!
Assembling the Pie
With your pie crust nestled in the pan, it’s time to assemble the filling. Begin by pouring in your prepared apple filling, ensuring it is evenly distributed. To create a layered effect, consider placing apple slices in a circular pattern, starting from the outside and working towards the center. This not only enhances the visual appeal but also ensures even cooking.
Lattice vs. Whole Crust: Tips for Decorative Edges
When it comes to topping your pie, you have two primary options: a lattice crust or a whole crust. A lattice crust involves weaving strips of dough over the filling, creating a beautiful crisscross pattern that allows steam to escape while showcasing the apple filling. For a whole crust, you can create decorative edges by crimping the dough with your fingers or using a fork to press down the edges.
For an elegant touch, consider adding a few leaves or floral designs cut from leftover dough. These embellishments not only provide an aesthetic appeal but also add a personal touch to your pie.
Finishing Touches
Once your pie is assembled, it’s time for the finishing touches. An egg wash, made by whisking an egg with a tablespoon of water, can be brushed over the crust to create a golden, glossy finish while baking. For added sweetness and crunch, sprinkle a little sugar on top of the crust before baking.
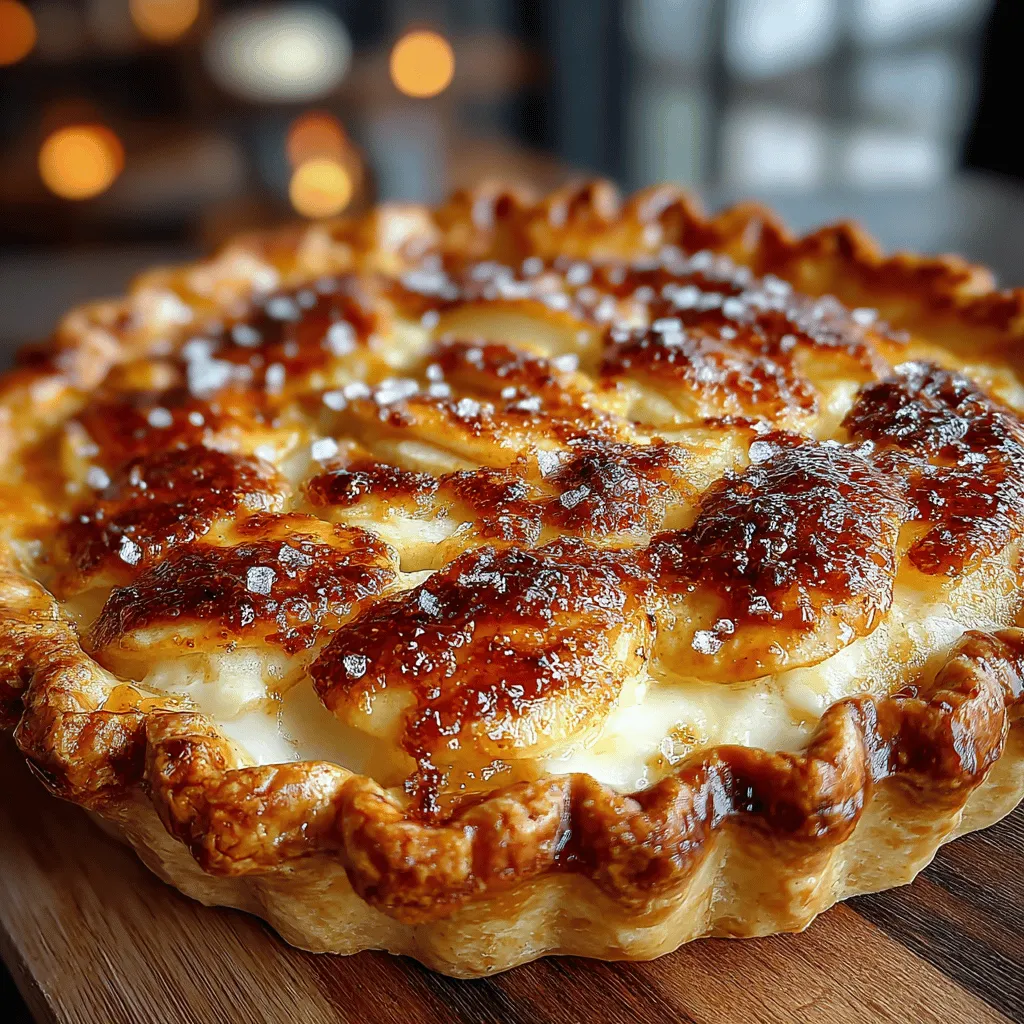
Visual Cues for a Perfectly Finished Pie
A perfectly baked apple pie should have a golden-brown crust, with the filling bubbling slightly at the edges. The apples should be tender yet retain some structure. If the crust appears to be browning too quickly, cover the edges with foil to prevent burning while allowing the filling to cook through.
Baking the Pie
Setting the right temperature is crucial for a perfect pie. Preheat your oven to 425°F (220°C) to start, allowing the crust to develop a crispy outer layer while keeping the filling from becoming too watery.
Importance of Monitoring the Pie for Doneness
Baking times can vary, but generally, your pie should bake for about 45 to 55 minutes. It’s essential to keep an eye on it during the last 15 minutes, as ovens can vary widely. Check for visual cues, such as bubbling filling and a golden crust.
Techniques to Prevent Over-Browning
If you notice the crust browning too quickly, use a pie shield or strips of aluminum foil to cover the edges. This technique protects the crust while allowing the filling to cook thoroughly.
Cooling and Serving Suggestions
After baking, allow your pie to cool for at least two hours before serving. This cooling time is crucial; it helps the filling set and makes slicing easier. A warm pie can result in a messy presentation, so patience is key.
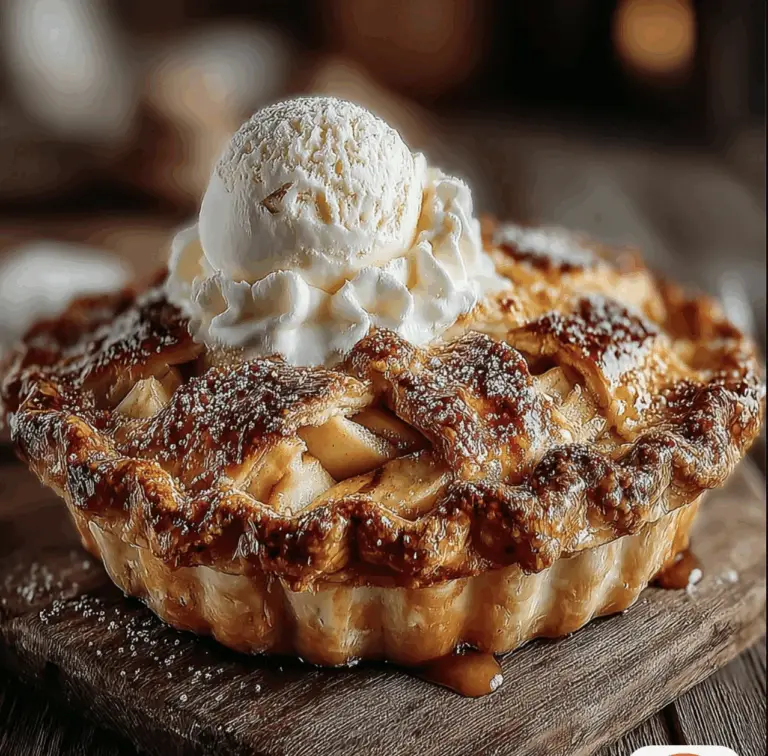
Serving Options: Ideal Pairings
When it comes to serving your Timeless Apple Delight, consider pairing it with a scoop of vanilla ice cream or a dollop of whipped cream. The creaminess complements the tartness of the apples beautifully. For an extra touch, drizzle some caramel sauce over the top.
Presentation Tips for Serving the Pie
For a stunning presentation, serve your pie on a decorative plate. You might sprinkle some cinnamon on top or garnish with fresh apple slices. Using a pie server, cut clean slices, and serve each piece with your chosen accompaniment for a delightful experience.
Nutritional Information
Apple pie can be a delightful treat, and apples themselves offer numerous health benefits. A slice of apple pie typically contains around 300-400 calories, depending on the crust and sugar used. Apples are rich in dietary fiber, vitamin C, and various antioxidants, making them a great choice for a dessert.
Healthier Alternatives for the Recipe
If you’re looking to lighten up the recipe, consider using whole wheat flour for the crust or substituting refined sugar with natural sweeteners like honey or maple syrup. You can also reduce the amount of sugar in the filling or use less butter. These adjustments can help maintain the delicious flavor while making the dessert a bit healthier.
Cultural Variations of Apple Pie
Apple pie is enjoyed worldwide, and many cultures have their unique twists on this classic dessert. For instance, in the United States, the traditional apple pie is often served with a scoop of vanilla ice cream, while in the Netherlands, it’s common to see apple pie made with a crumbly topping or custard filling.
In Germany, apfelkuchen is a popular variation, often incorporating a sponge cake base and a cinnamon-sugar topping. Each regional ingredient and preparation method offers a new flavor profile, showcasing the versatility of this beloved dessert.
Conclusion
Making your Timeless Apple Delight is not just about following a recipe; it’s a journey filled with tradition, love, and the joy of sharing. From rolling out the dough to savoring the first slice with family and friends, every step is infused with warmth and nostalgia.
As you enjoy this pie, take a moment to appreciate the rich history behind apple pie and its place in home kitchens around the world. Preserving classic recipes like this one ensures that they continue to bring joy to future generations. So gather your loved ones, share a slice, and create memories that will last a lifetime.