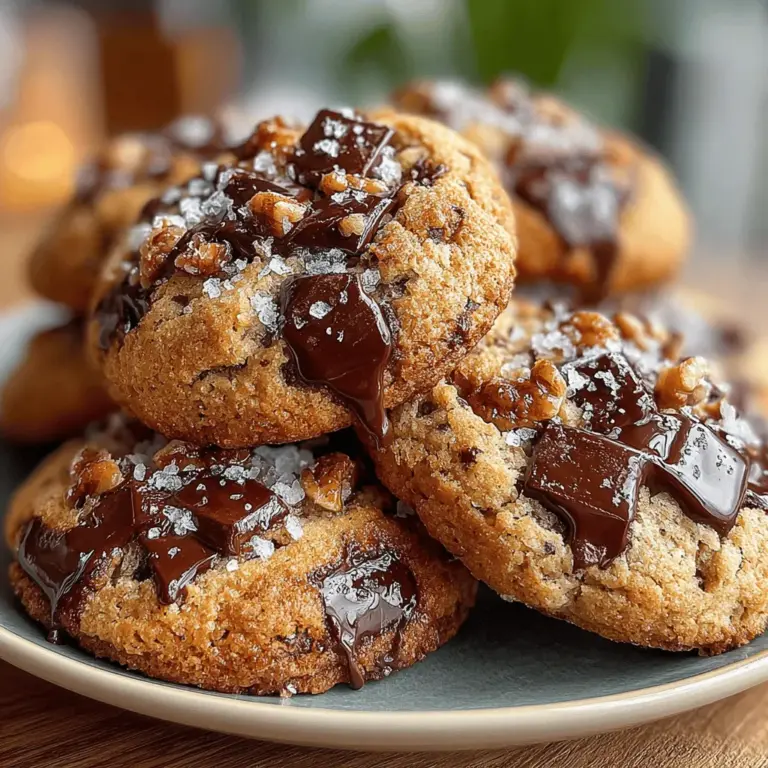
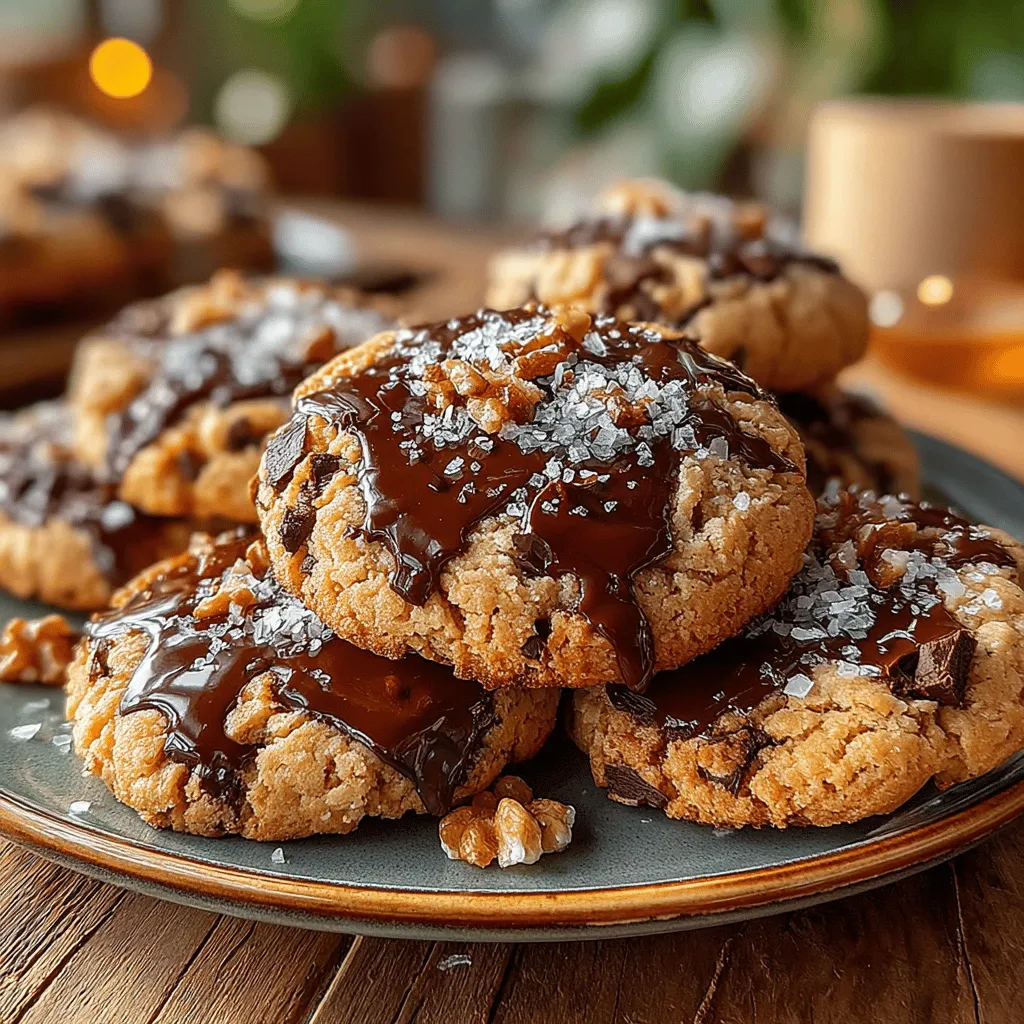
Chewy Brown Butter Banana Cookies You Can’t Resist
When it comes to baking, few treats can rival the comforting allure of cookies. They’re versatile, easily shareable, and can satisfy a variety of cravings. Today, we’re elevating the classic cookie experience with an irresistible recipe for Chewy Brown Butter Banana Cookies. This delightful concoction marries the rich, nutty flavor of brown butter with the natural sweetness of ripe bananas, resulting in a cookie that’s not only chewy but also bursting with flavor. The addition of chocolate chips and optional nuts takes these cookies to a whole new level, making them a decadent treat worth indulging in.
The popularity of cookies in modern baking cannot be overstated. They are a staple in households, often associated with warmth, nostalgia, and the simple joy of sharing. While traditional recipes have their charm, this particular take on banana cookies offers a unique twist that’s bound to impress even the most discerning cookie enthusiasts. The chewy texture, combined with hints of caramel from the brown butter and the fruity notes from the bananas, creates a cookie experience that’s truly one-of-a-kind. Whether you’re baking for a special occasion or just treating yourself on a cozy afternoon, these cookies are sure to become a favorite.
To fully appreciate the magic of Chewy Brown Butter Banana Cookies, let’s dive into the essential ingredients that make this recipe shine. Each component plays a vital role in crafting the perfect cookie, contributing to its flavor, texture, and overall appeal.
Understanding the Ingredients
Unsalted Butter: At the heart of this recipe is unsalted butter, which is essential for achieving the delectable brown butter flavor. Browning the butter not only enhances its natural richness but also adds a depth of flavor that elevates the cookies from ordinary to extraordinary. The process of browning transforms the butter, coaxing out nutty notes that will complement the sweetness of the bananas beautifully.
Brown Sugar: The use of brown sugar in this recipe is a key factor in creating cookies that are chewy rather than cakey. Brown sugar contains molasses, which not only adds sweetness but also moisture, contributing to the desired chewy texture. The caramel undertones of brown sugar pair wonderfully with the brown butter, creating a harmonious flavor profile.
Ripe Bananas: Bananas are the star ingredient in this recipe, providing natural sweetness and moisture. The riper the bananas, the better—overripe bananas, with their brown spots, yield the sweetest flavor and the softest texture. They not only enhance the taste of the cookies but also contribute to their softness and chewiness.
Egg and Vanilla Extract: Eggs serve multiple purposes in baking. They act as a binding agent, helping to hold the cookie dough together, while also providing richness. Vanilla extract is a flavor enhancer that elevates the overall taste of the cookies, adding a warm, inviting aroma that complements the other ingredients.
Flour, Baking Soda, and Salt: All-purpose flour is the foundation of the cookie dough, providing structure. Baking soda acts as a leavening agent, ensuring the cookies rise slightly and achieve that ideal chewy texture. A pinch of salt is crucial for balancing the sweetness and enhancing the overall flavor of the cookies.
Chocolate Chips: No cookie is complete without chocolate, and in this recipe, chocolate chips are the crowning glory. They melt into gooey pockets of chocolate goodness within the cookies, creating bursts of rich flavor with every bite. You can choose between dark or semi-sweet chocolate chips based on your preference, but either option will add a delightful contrast to the sweetness of the bananas.
Nuts: While optional, adding nuts such as walnuts or pecans can provide an extra layer of texture and flavor. The crunch of the nuts beautifully contrasts with the chewy cookie, making each bite more satisfying. If you’re a fan of nuts, don’t hesitate to toss in a handful for a delightful crunch.
The Science of Brown Butter
Browning butter may seem like a simple process, but it’s one that can significantly impact the flavor of your cookies. When you heat butter, the water content evaporates, and the milk solids begin to toast. This transformation results in a rich, nutty aroma and a deeper flavor profile as the sugars in the milk solids undergo the Maillard reaction—a complex chemical reaction that occurs when proteins and sugars are heated together.
To achieve the perfect brown butter, place your unsalted butter in a saucepan over medium heat. As it melts, keep a close eye on it. You’ll notice the butter bubbling as the water evaporates; this is the initial stage. Continue heating, stirring occasionally, until the butter turns a golden brown color and releases a fragrant, nutty aroma. Be vigilant, as it can quickly go from perfectly brown to burnt. The ideal brown butter will have a rich amber hue and a slightly nutty scent, indicating that the milk solids have caramelized beautifully.
Step-by-Step Instructions
Now that we’ve covered the essential ingredients and the science behind brown butter, let’s dive into the first crucial step: browning the butter.
Browning the Butter:
1. Begin by measuring out the required amount of unsalted butter. For this recipe, you’ll typically need about 1 cup (2 sticks) of butter.
2. In a medium saucepan, place the butter over medium heat. Allow it to melt completely, stirring occasionally to promote even heating.
3. Once melted, the butter will start to bubble. Keep an eye on it, as this is where the magic begins. You want to ensure that the milk solids settle at the bottom of the pan.
4. As the butter continues to cook, watch for a change in color. It will start to take on a golden hue. At this point, you’ll also notice a nutty aroma filling the kitchen—this is a sign that you’re on the right track.
5. Continue to stir the butter gently. Look for the milk solids at the bottom to turn a deep brown color. This is the key indicator that your brown butter is ready.
6. Once you reach the desired color and aroma, immediately remove the saucepan from the heat to prevent the butter from burning. Pour the brown butter into a heatproof bowl to cool slightly before using it in your cookie dough.
By following these steps, you’ll create a rich, flavorful brown butter that will serve as the backbone of your Chewy Brown Butter Banana Cookies. The process may seem simple, but the depth of flavor it adds is unparalleled, setting the stage for the delightful cookies that await.
Stay tuned as we continue with the rest of the recipe, where we’ll combine these flavorful ingredients and create a batch of cookies that you simply can’t resist.
Combining Wet Ingredients
To create the perfect Chewy Brown Butter Banana Cookies, the first step involves combining your wet ingredients. Start by taking your cooled brown butter and adding it to a mixing bowl along with the sugars—both granulated and brown sugar. The process of browning the butter not only enhances its flavor but also adds a rich nuttiness that will elevate your cookies. Mix these ingredients until they are well combined; the mixture should appear creamy and slightly fluffy.
Next, incorporate the mashed ripe bananas. This is where the unique character of your cookies begins to take shape. The bananas add natural sweetness and moisture, which are essential for achieving that chewy texture. Make sure to mix the bananas thoroughly into the butter and sugar mixture. A well-blended batter will ensure that the banana flavor is evenly distributed throughout the cookies, leading to a consistent taste in every bite.
Preparing Dry Ingredients
While your wet ingredients are coming together beautifully, it’s time to focus on the dry ingredients. In a separate bowl, whisk together the all-purpose flour, baking soda, and salt. This step is crucial, as it ensures that the leavening agent (baking soda) is evenly distributed throughout the flour. Uneven distribution can lead to cookies that rise improperly or have an inconsistent texture.
Whisking the dry ingredients also helps to aerate the flour, which can contribute to a lighter cookie. After combining, set this bowl aside as you prepare to merge these dry ingredients with your wet mixture.
Mixing Techniques
When it comes to combining the wet and dry ingredients, gentle mixing techniques are key. Carefully fold the dry ingredients into the wet mixture using a spatula or wooden spoon. The goal here is to incorporate the flour without over-mixing, which can lead to tough cookies. You want to mix just until the flour is no longer visible, leaving some small lumps in the dough.
If you’re adding chocolate chips or nuts, now is the time to fold them in. Opt for semi-sweet chocolate chips for a classic flavor, or consider using dark chocolate for a richer taste. If you choose to include nuts, toasted walnuts or pecans can add a delightful crunch that contrasts beautifully with the chewy texture of the cookies.
Chilling the Dough
After your dough is mixed, it’s important to chill it in the refrigerator for at least 30 minutes. Chilling the dough serves several purposes: it firms up the fat (brown butter), which helps prevent the cookies from spreading too much during baking. This results in a thicker, chewier cookie. Chilling also allows the flavors to meld, enhancing the overall taste of your cookies. A well-chilled dough will yield cookies that are not only chewy but also rich in flavor.
Baking Process
When you’re ready to bake, preheat your oven to 350°F (175°C). Line a baking sheet with parchment paper for easy removal of the cookies once they are baked. Using a cookie scoop or a tablespoon, drop rounded balls of dough onto the prepared baking sheet, leaving enough space between each ball for spreading.
Bake the cookies for 10-12 minutes, or until the edges are golden brown while the centers remain soft. Keep an eye on them during the last few minutes to prevent overbaking. The cookies will continue to cook slightly after you remove them from the oven due to residual heat, so take them out when they are just set.
Cooling and Enjoying
Once baked, transfer the cookies to a wire rack to cool. This step is essential as it allows air to circulate around the cookies, preventing them from becoming soggy. Cooling on a wire rack ensures that the cookies maintain their chewy texture while achieving a slightly crisp edge.
Now comes the best part: enjoying your cookies! They are perfect on their own, but you can elevate the experience by pairing them with a scoop of vanilla ice cream. The warm cookies will melt the ice cream slightly, creating a delicious contrast in temperatures and textures. Alternatively, serve them alongside a tall glass of cold milk or a steaming cup of coffee for a comforting snack.
Texture and Flavor Profile
When baked to perfection, you can expect your Chewy Brown Butter Banana Cookies to have a delightful texture. The outer edges will have a slight crispness, while the centers remain soft and chewy—a perfect balance that cookie lovers crave. The combination of ripe bananas and brown sugar creates a unique sweetness that is both comforting and indulgent.
The nuttiness of the brown butter adds depth, while the richness of chocolate chips provides little bursts of flavor throughout. If you decide to add nuts, they contribute a delightful crunch that complements the chewiness of the cookie. For variations, consider using white chocolate chips for a sweeter twist, or even dark chocolate for a more intense chocolate experience. You can also experiment with different types of nuts, like macadamia nuts or almonds, to add distinct flavors and textures to your cookies.
Serving Suggestions and Pairings
These Chewy Brown Butter Banana Cookies are versatile and can be enjoyed in various ways. For a delightful dessert, serve them warm with a scoop of vanilla ice cream. The ice cream melts into the warm cookie, creating a decadent treat that is sure to impress.
You can also enjoy these cookies alongside a glass of cold milk, which perfectly complements their sweetness. For a unique brunch spread, consider including them on a platter with fresh fruits and pastries. They can be an excellent addition to your breakfast table, paired with coffee or tea for a sweet morning treat.
For beverage pairings, robust coffee or a smooth latte can enhance the flavors of the cookies, while a cup of herbal tea can provide a refreshing contrast. Enjoying these cookies with a glass of almond milk or oat milk can also be a delicious alternative, especially if you’re looking for dairy-free options.
Storage and Shelf Life
To keep your cookies fresh and delicious, store them in an airtight container at room temperature. They can last up to a week, although they are best enjoyed within the first few days when they are freshly baked. If you want to extend their shelf life, consider freezing them.
For freezing, allow the cookies to cool completely, then place them in a single layer in a freezer-safe container, separating layers with parchment paper. They can be frozen for up to three months. When you’re ready to enjoy them, simply thaw the cookies at room temperature or pop them in the microwave for a few seconds to regain their chewy texture.
If you prefer, you can also freeze the unbaked dough. Scoop the dough into balls and freeze them on a baking sheet until firm. Once frozen, transfer the dough balls to a zip-top bag and store in the freezer. When the craving strikes, you can bake fresh cookies straight from the freezer by adding a couple of extra minutes to the baking time.
Conclusion
In conclusion, these Chewy Brown Butter Banana Cookies are a delightful addition to any baker’s repertoire, combining the rich flavors of brown butter and ripe bananas with the satisfying chewiness that everyone loves. The balance of flavors—from the sweetness of the bananas and brown sugar to the nuttiness of the butter and richness of chocolate—creates a cookie experience that’s simply irresistible.
Baking at home not only fills your kitchen with delightful aromas but also allows you to create treats that you can share with family and friends. Whether you’re looking to use up ripe bananas or simply indulge in a delicious cookie, this recipe is sure to please. So gather your ingredients, embrace the joy of baking, and enjoy the satisfaction of creating something truly special with your own hands.
